Before I get into today’s topic, I just wanted to let you know I’ve been active on my Youtube channel a bit more recently, I’ve put out a few videos: a bird painting demo, a quick tip for mixing (complementing today’s topic), and also a video about my shopping ban experiment (read the post here). If you’d like to give the videos a like or subscribe to my channel, I’d totally appreciate it! I’m planning on making videos more frequently now, depending on the topics you’d like to see – so definitely let me know about what interests you!
Now on to today’s topic – a look at mixing fundamentals and pigment properties.
Mixing is half of the fun with watercolor, but there are some aspects to it you will likely only notice when you’ve painted for a while. You might be wondering why some of your mixes end up dull and muddy, or why some colors just don’t seem to mix well.
A big factor that will change how colors react with each other are the paints themselves. Watercolor pigments have different characteristics, one of them being the transparency. Manufacturers label their paints with small symbols indicating if a pigment is transparent, semi-transparent or opqaue.
Transparent vs opaque colors
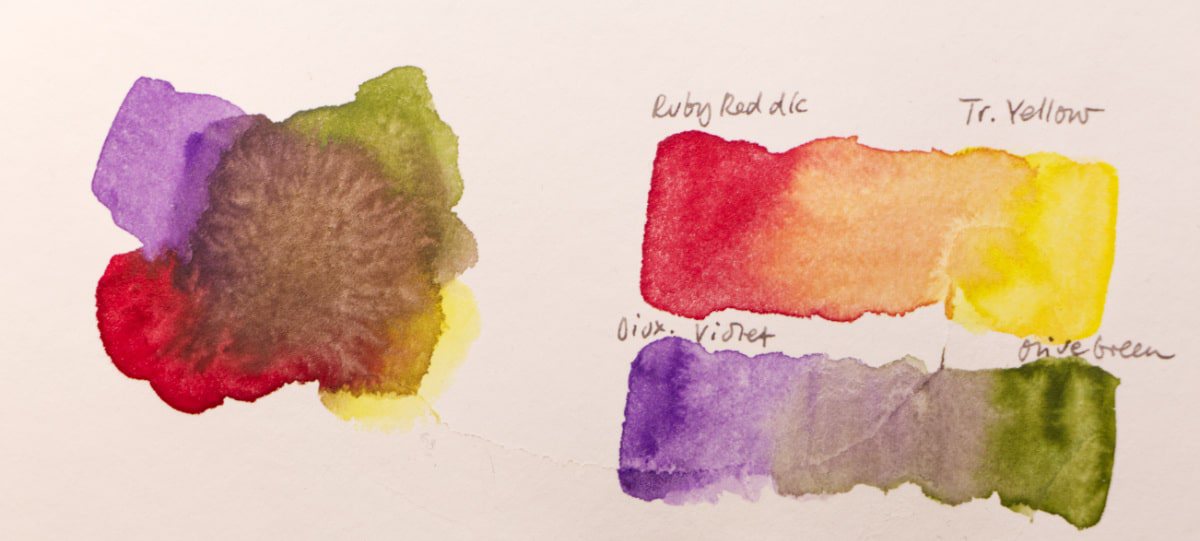
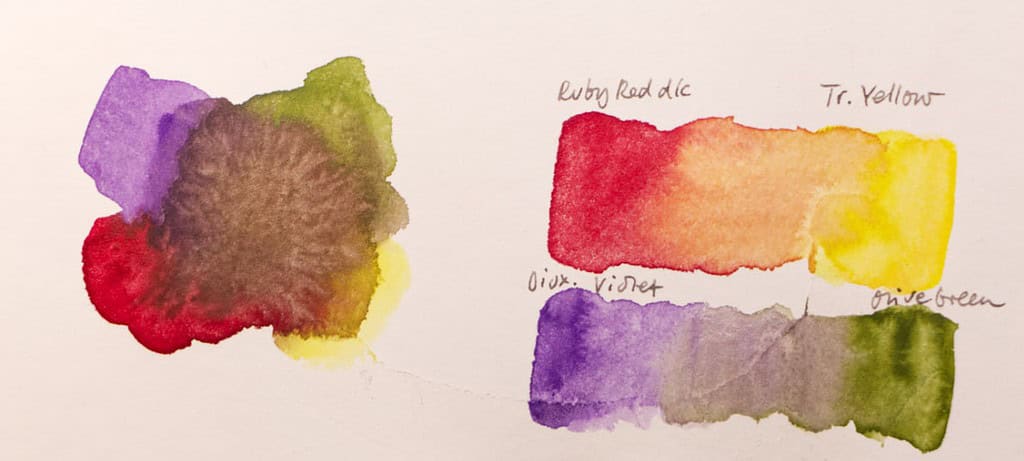
As a rule of thumb, pigments that are transparent are better mixers for getting vibrant colors, and opaque pigments will often lead to muddy, dull mixes and the colors will lose their brightness. The more opaque a color, the less light will be reflected back from the white paper, because the paint layer blocks it. Really transparent colors will allow for a lot of paper white to shine through, thus resulting in a more luminous color.
Opaque colors can be the right choice for what you want to do, so there’s no need to avoid them completely. Also, many opaque colors become wonderfully transparent when you dilute them and add thin layers. So it makes sense to know you colors and their characteristics: sometimes you will want less intense colors, and sometimes intense ones. Knowing why you get which result is key to successful painting.
Yet, a lot of watercolorists mainly use transparent colors and avoid opaque colors because they give them greater flexibility and clearer mixes. I have a preference for transparent watercolors, too, although I sometimes like to paint with more opaque paints – then I use gouache, which is basically opaque watercolor. You can combine the two techniques.
In a lot of premade watercolor sets, you will find opaque colors like cadmium pigments. It’s worth learning about the characteristics of your paints in any case. Note that you can still achieve beautiful transparencies with cadmium (or other opaque) pigments when you water them down – they’re just not that transparent when you use a lot of them or when you use them on top of already painted layers. For sketching, you will probably get away with a bit more opacity in some paints. I often use layering techniques, so I mainly have transparent colors. You can learn about the transparency of your paints by looking at color charts, or the actual tube or pan packaging you have – all reputable manufacturers list the information for their paints.
Candidates to look out for that are opaque are usually:
- Cadmium Yellows, oranges and reds
- Naples Yellow (often has white added)
- Cerulean Blue
- most warm reds (like Pyrrol Red) tend to the opaque side and can produce less vibrant mixes
- Chrome Oxide Green
- Yellow Ochre (there are differences between brands)
- Venetian Red, Indian Red, English Red (can be very overpowering, but still beautifully transparent when diluted and used on its own)
- some “convenience mixes” if they contain a semiopaque component
- Raw Umber, Burnt Umber and other Earth tones if they’re not very finely milled
- Black
- Any mix with white pigment
Often student grade paints are quicker to produce dull mixes when they’re not used carefully, because they contain more filler and less pigment.
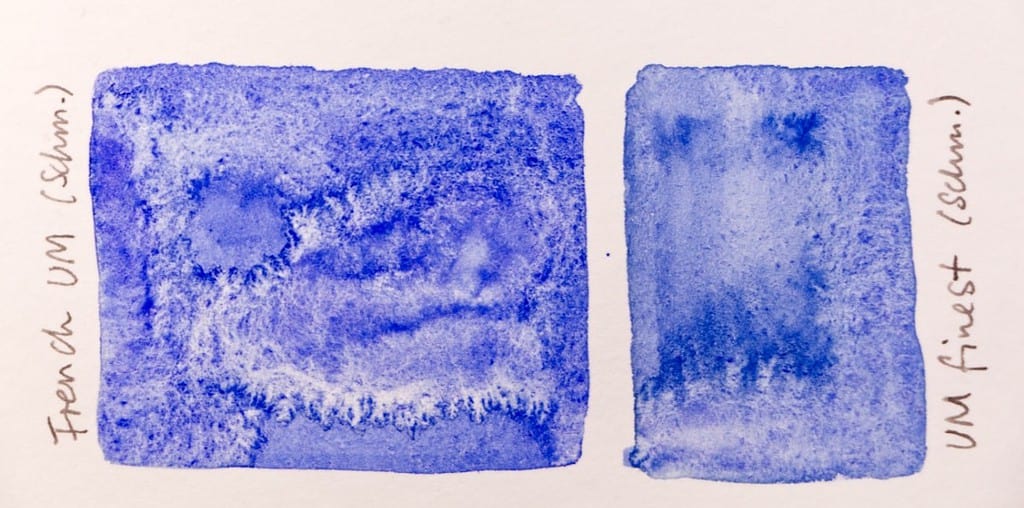
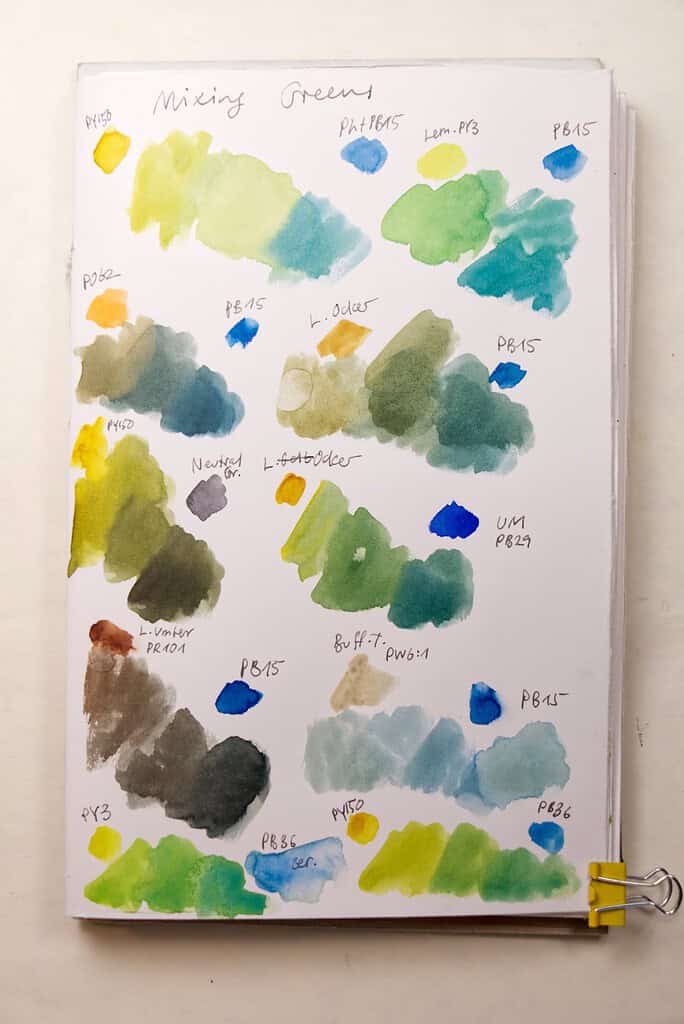
Great mixing colors are often staining and don’t look very interesting on their own, because they’re so intense – like the Phthalos (Green and Blue). But they are wonderful in combination with other colors. And there are many other great choices for mixing, like Azo-nickel yellow or Cobalt Blue, Viridian Green, Quinacridone reds and violets, Perylene reds and green, Ultramarine Blue – just make sure that the paint you actually get is made of a single pigment. Note that characteristics like granulation in one pigment will likely show through in a mix. Some manufacturers actually offer different options for the same pigment if you want to choose, Schmincke for example has different Ultramarine blues, both made of the pigment PB29: their French Ultramarine is granulating, and their Ultramarine finest is very finely milled and non-granulating.
Best techniques for mixing colors
Let’s also take a look at the best techniques for mixing colors – basically how to use your paints in a way so you will reduce your chances of getting mud.
One reason for getting dull mixes is adding too many different colors. A mix should contain two to three colors if you want the color to stay bright and transparent. Note that a lot of premixed colors (also called „convenience mixes“) by manufacturers already contain two or more pigments that can also be less transparent, so be careful when adding those convenience colors to any mix. The same thing can happen when you mix a lot of colors on your paper or palette.
Particularly when you mix complements you quickly lose intensity (or chroma). This can be intended, but in many cases it happens by accident. Think of a sunset sketch where you want to add orange over the still blue areas of your sky – since these are complementary colors they will produce a dull, green-greyish color (depending how yellow your orange is). However, if you want to mix a neutral color, this can be a great way to get it. So often it’s just about knowing how colors react with each other and choosing the intended effect – for a sunset, you won’t want a low intensity mix, but for a shadow, it might just be right.
Always make sure that you have a reasonably clean palette and clean pans/color wells when you want to paint with intense, pure colors. This seems obvious, but what can happen on the paper can also happen on the palette.
If you’re a fiddler and a perfectionist, note that going over the same area too many times will also dull your color, particularly if you’ve already added several layers and they get reactivated and mingle (this happens a lot on certain wood pulp papers, because the paint doesn’t sink into the fiber, but its on top). Also, since watercolor is a transparent medium, you can cancel out the luminosity of one layer by adding a complement, or just too many different colors. Each time you add a layer a bit more vibrancy is lost – since your white is the paper. Of course, this can also be an intended effect – like toning down a particularly intense area, or unifying a painting with a thin glaze of one color.
A good place to experiment with colors and mixing can be your sketchbook, or if you want to keep things a bit more consolidated, a mixing sketchbook. Be sure to note the pigments you used for a mix, so that you can refer back to how you got there.
If you’re starting to think about what colors you really want and need in your palette and how you can get the most out of your paints, take a look at my new course about setting up a custom watercolor palette. This post touched on a lot of things that we will take a look at in the course:
You will learn more about pigments and their properties, how to choose the best colors for your own watercolor palette, how to get better mixing results, and see how to start a mixing sketchbook. I’ll basically take you through the entire process of setting up a custom palette for sketching and outdoor painting, while also providing you with a theoretical background on color:
How do you explore your watercolor paints and mixes? What are your favorite mixers I’d love to hear about it, let me know in the comments!
Thanks for such a useful post Julia. I’ve been struggling with how best to mix paints and this will be a great aid for me.
I’m glad to hear this was helpful to you. Happy mixing!
very well explained. I learned a lot in that post ! Thank you for sharing your knowledge with us!
You’re welcome!
Thank you Julia for these explanations: while beginning and intermediate watercolor teachers do explain and sometimes demonstrate this aspect of watercolor, I believe that it is not emphasized enough. Painting a watercolor without knowing about color mixing almost guarantees a semi-successful painting, at best. Thank you for explaining this more clearly and for your generous help with other aspects drawing and watercolor.