I’ve been sketching lots of flowers lately and as we’re starting the live version of Introduction to Botanical Sketching this week (you can still join the feedback group!) I thought I’d share a bit more of my process for quick botanical sketches. Plants are a great subject to draw for beginners, as they are very patient (don’t move or run away) and interesting and pretty to look at. I never get tired of drawing flowers.
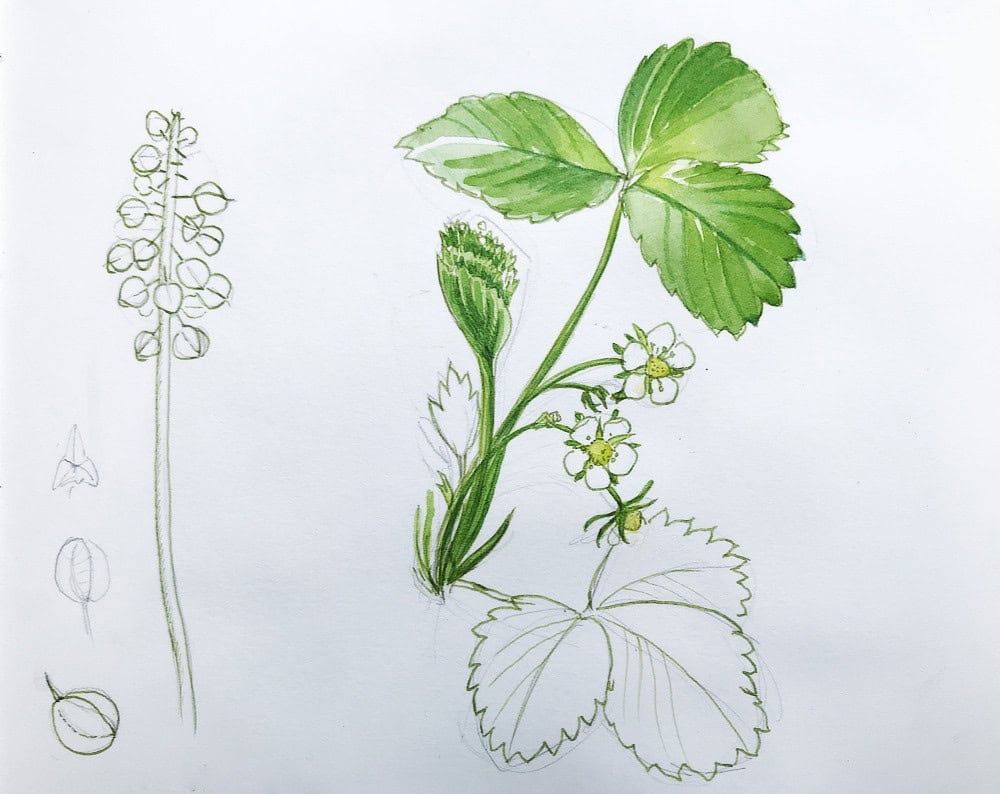
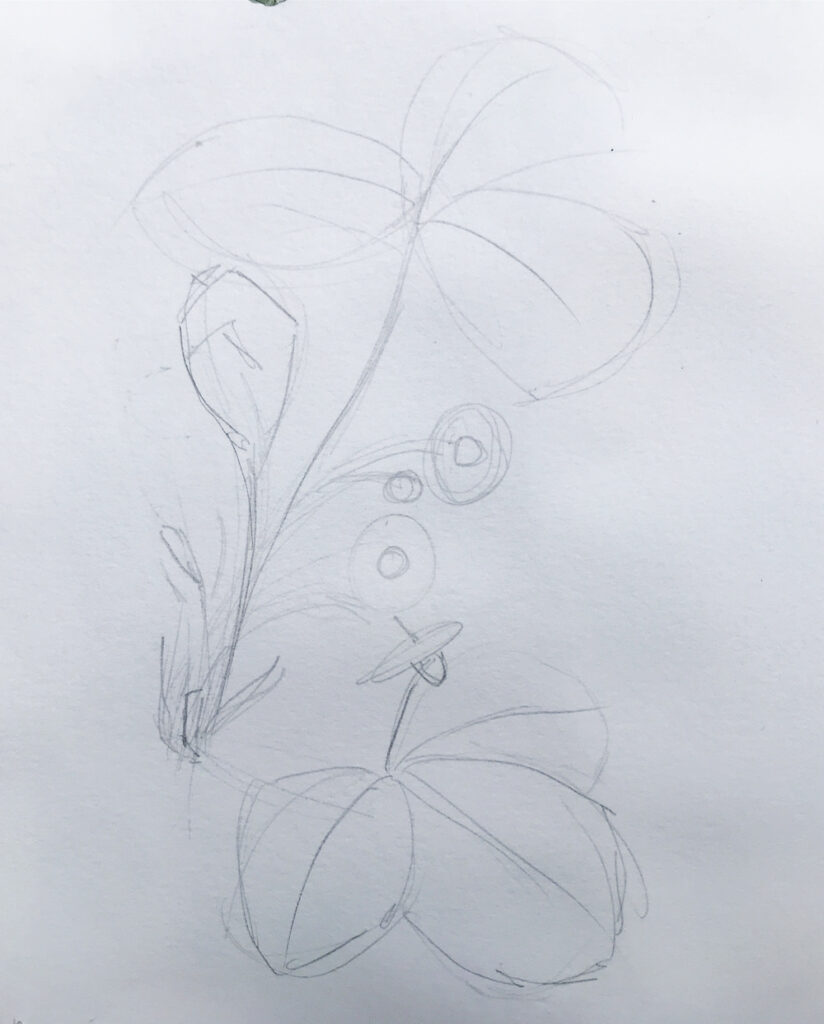
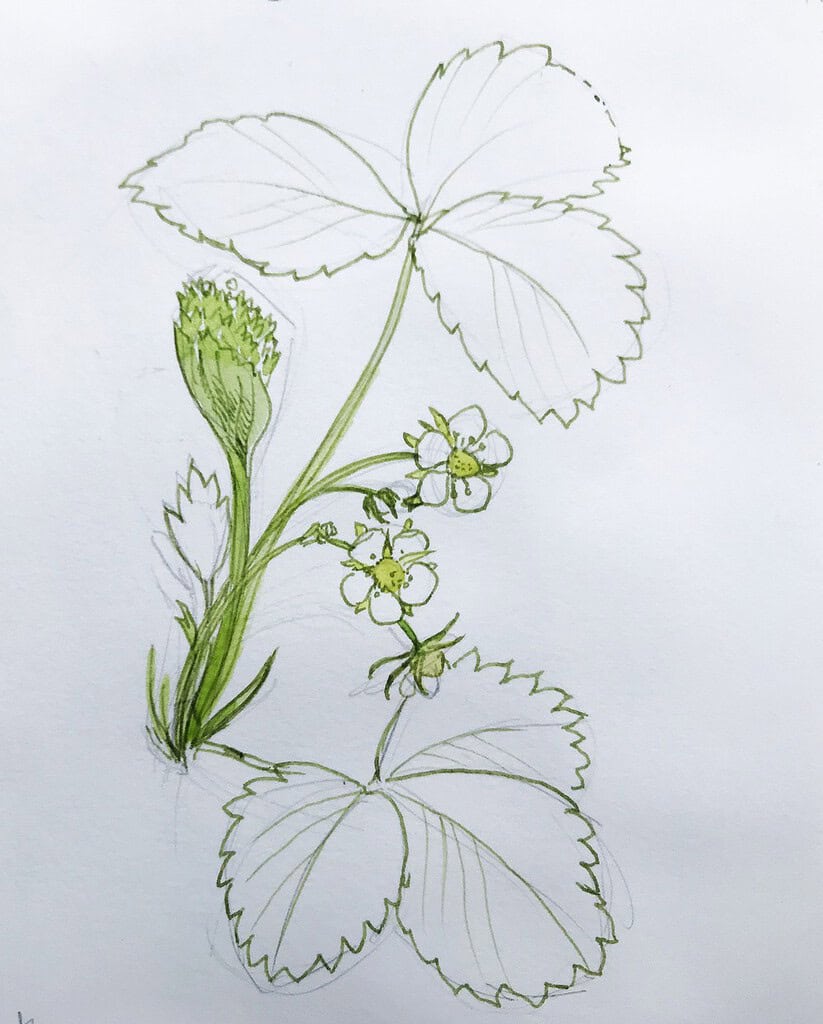
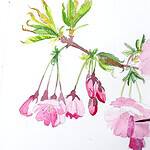
The first step is always to get a grasp of the absolute basics – basic shapes, volumes and angles. Almost always I start with a very rough (and light) pencil drawing, just to get a feel for the placement of the different shapes, and how the lines and volumes relate to each other. It makes sense to familiarize yourself with basic shapes like circles, rectangles and triangles to describe floral forms, and thinking in 3d volumes (cones, spheres) will help even more with translating a three-dimensional form to the page. The strawberry I’ve chosen has simple shapes – a round flower, with a rounded cone in the middle, and triangular shaped leaves that bend slightly.
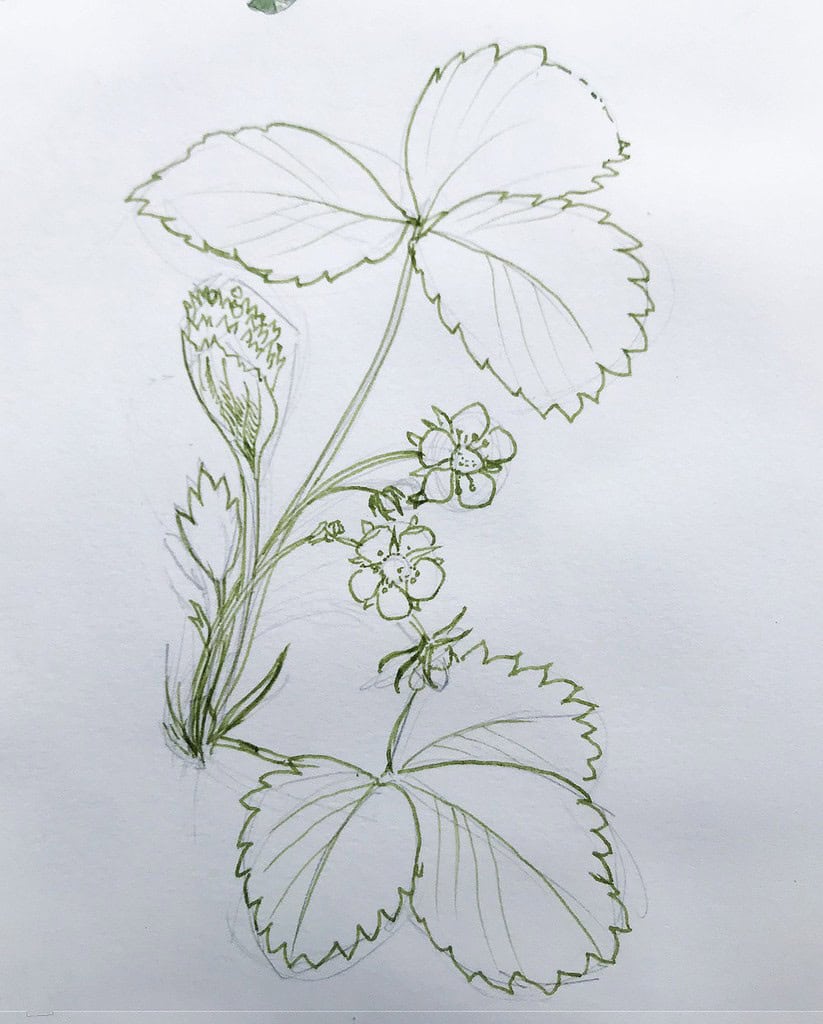
Once I’m happy with the placement of the rough outlines, I switch to my fountain pen for a more detailed drawing. I’ve recently described how I use waterproof fountain pen ink to be able to paint over my linework later. You can of course draw with any tool you like – pencil, fineliner, pen. I start with the elements in the front, that makes drawing overlapping elements easier. I observe the plant in front of me very closely and then place my lines – with ink, there’s no going back. I still have my pencil framework to fall back on. I pay special attention to the small serrations on the edge of the leaf.
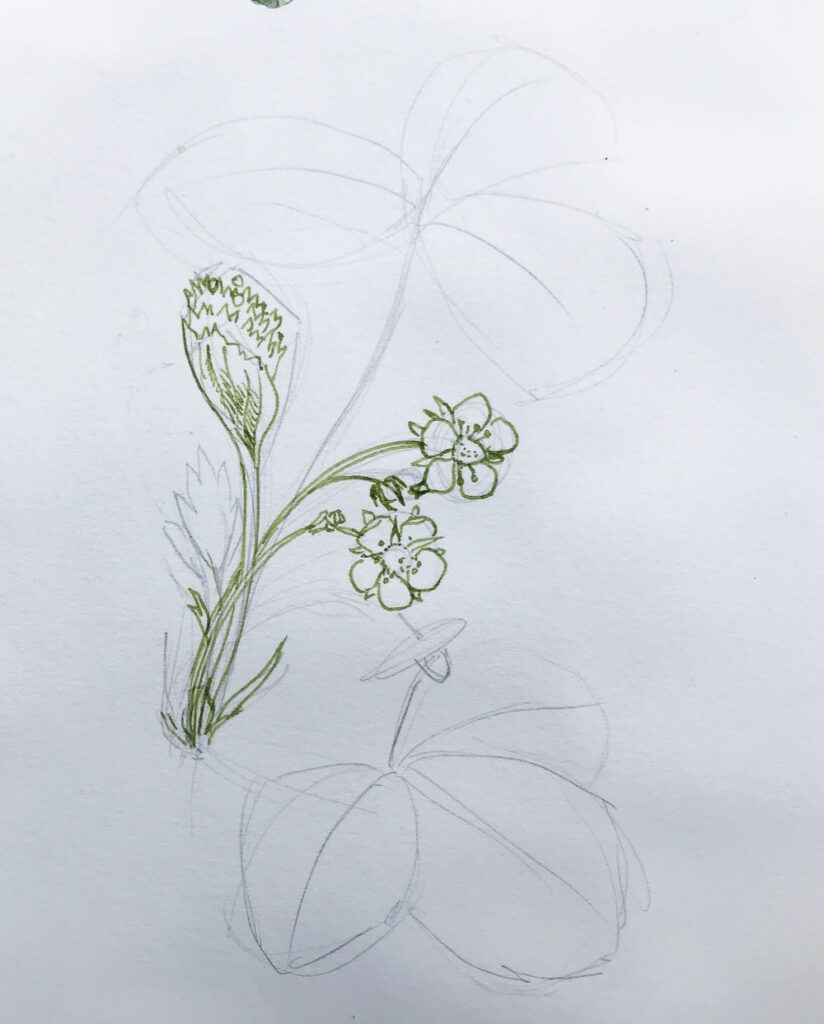
Bit by bit, I’m adding more linework, and I try to be mindful of the line thickness and quality, too. Some lines like the veins on the leaves are thinner, lines in places where the light hits the leaf or in the background can be dotted or broken. In other places I add a bit of hatching to indicate a shadow. I try to keep my lines as clear statements – I observe closely what I see, then state the line.
With the ink linework finished, I can switch to watercolor and mix a light yellow green for the middle of the flowers and the stems. I apply the paint in a very diluted thin mix – I can always add more paint later, and I want to keep the impression of light on the surface in some areas of the leaves.
As my first layer has (almost) dried, I can go back with a darker green and define some of the veins on the leaf. I keep everything quite loose- it’s still a sketch, and I have enough definition and detail from my ink outlines.
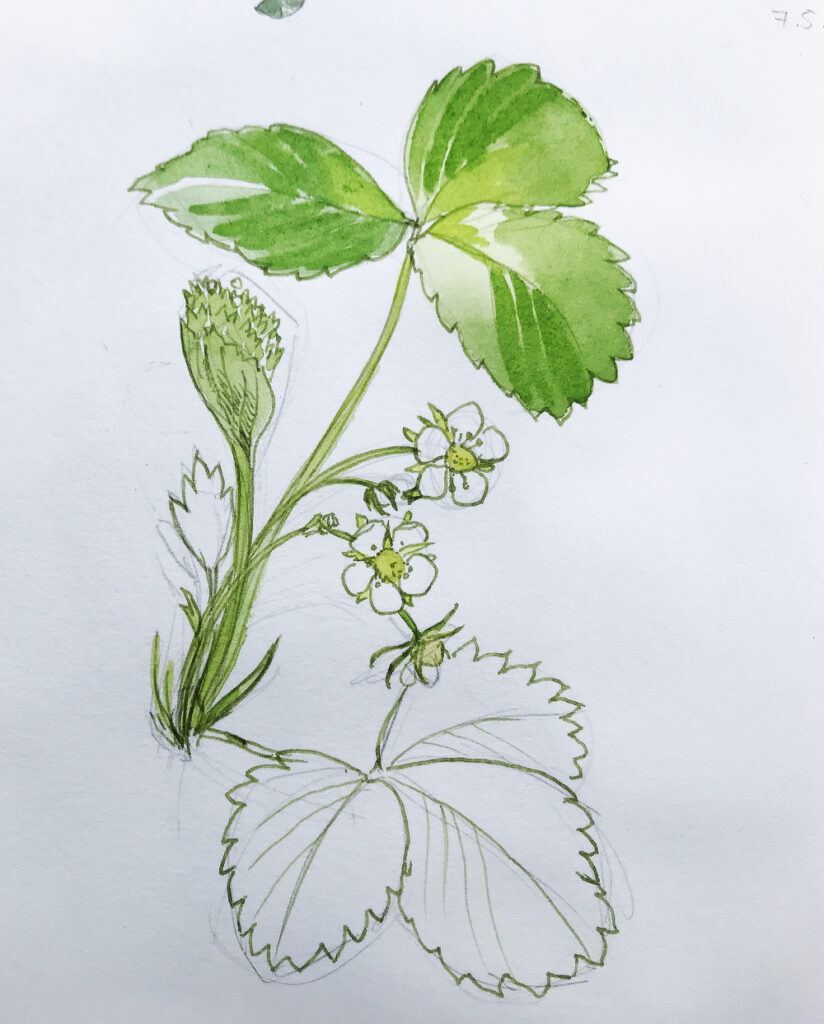
I add an even darker, slightly bluer green in some areas to give the sketch more contrast and bring out certain areas, like the unfolded leaf or the blossoms. I use a very small brush for this so that I can place precise lines – this part of the sketch is again more like drawing than like painting.
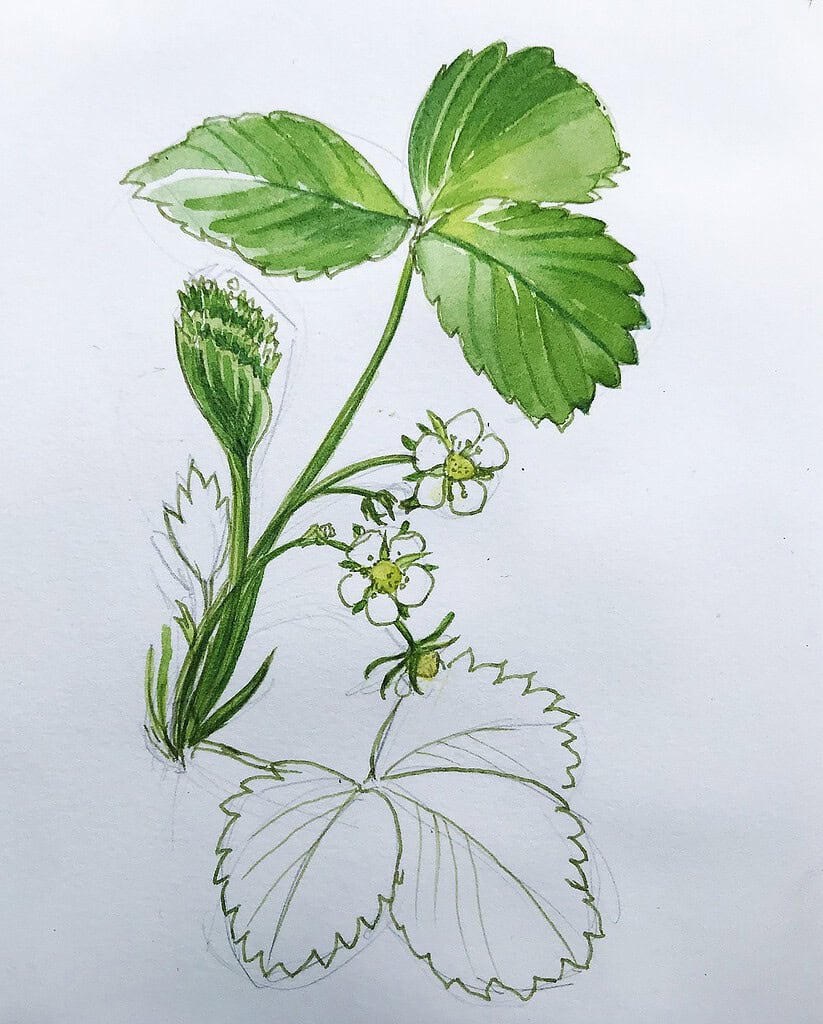
You’ll notice that I’ve left a few parts of my sketch unfinished, and I’ve not erased all of my loose pencil lines (only those in the white parts of the flower). This gives the sketch a nice work in progress feel – it’s a study, not a finished botanical illustration. Apart from saving time I really like how this looks.
I hope this insight into my sketching process for botanical subjects was helpful to you.

Thanks for these tips Julia. Your posts are always so helpful.
That you Janette, I’m glad to hear that!!
I really like how you mention it being a study, so you leave parts unfinished and some lines not erased. I appreciate that since it is journaling in nature, not perfection. I am working on being more loose, so that is a good mindset to have. Loved this post!
Exactly, that’s what I try to keep in mind for these journaling entries – they’re loose studies, not precise masterworks. Keeps it a more fun, too. Glad you liked the post! 🙂
I have tried to join your botanical course twice. On my iPad, the Captcha doesn’t go through, and on my computer, once I click on the course I want, I can’t get to the place to put in my credit card info. Can you help me?
I took your drawing basics course and really liked it!
Thanks, Susan
I sent you an email Susan!
Can’t wait to get out and do some sketching. Great tips. Thank you!
Glad to hear that – enjoy your sketching!!
I also love the ‘Work in progress’ look. Thank you for describing your process. So helpful. I liked the tip about using dotted lines in ink where the light is hitting the subject. Thank you
Great to hear that – you’re welcome Melanie! 🙂
Hi Julia,
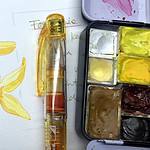
Great blog, thank you! Did you use the green preppy fountainpen? Is the ink it comes with waterproof or did you fill it with other ink?
Greetings, Miriam
I use Rohrer + Klingner Sketch Ink which is waterproof and made especially for fountain pens (doesn’t clog or dry in the pen feed). I think the ink that comes with the Preppy pens is neither waterproof nor lightfast, I always refill them with other inks. 🙂 Hope that helps!