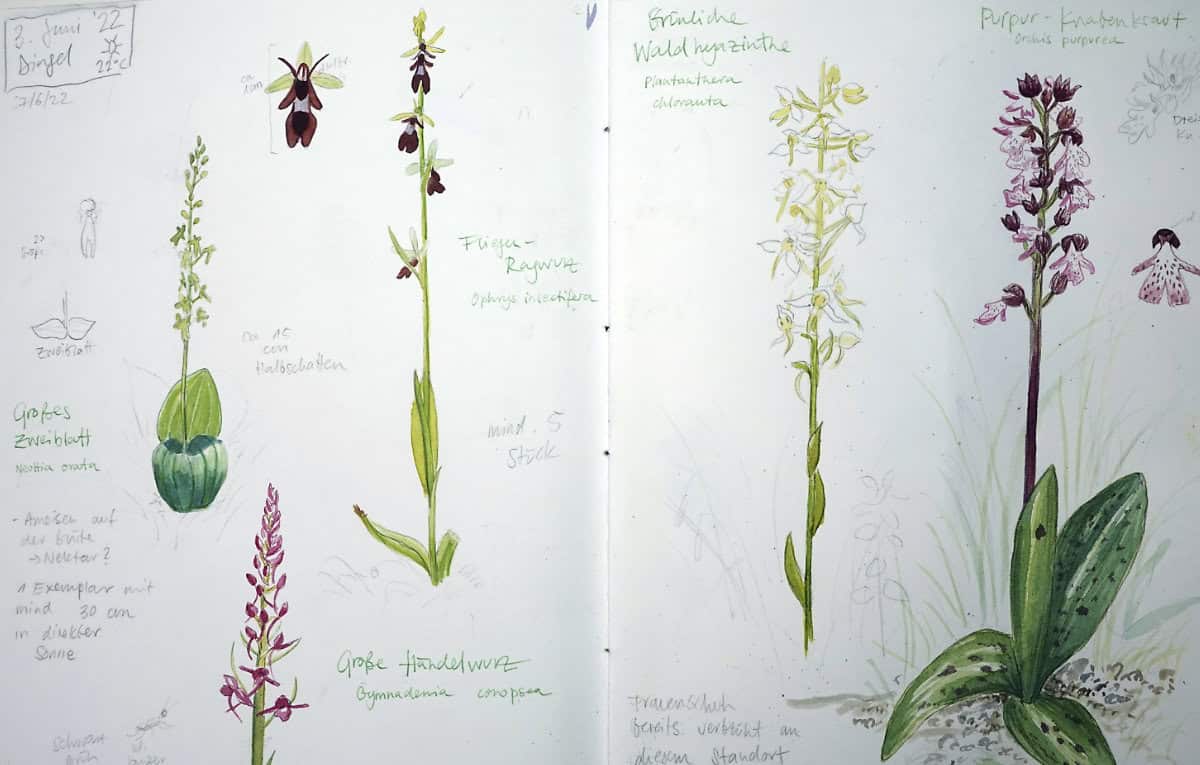
Last time, I took you with me on a day of field sketching rich with local plants and orchids. There were so many and the day became increasingly hot that I didn’t finish all my sketches on that day. So I took a few close-up photos and made some color notes, and decided to finish my sketches at home. This process is what I will share with you today.
I hope you’ll enjoy this second part of the wild orchid sketching session!
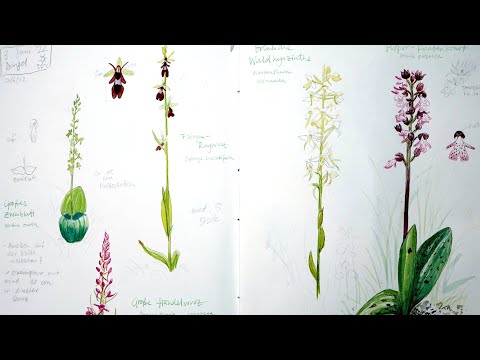
Finishing field sketches at home (video)
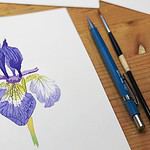
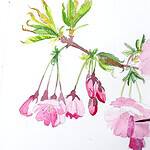
I’m still experimenting with how to combine watercolor and waterproof ink, but it’s a technique I really like so far. And at home I can use my dip pens, which is always a welcome change.
Another element I’m integrating more and more are loose watercolor backgrounds for my plant drawings. I add a few grasses and other plants from the habitat around the plant, and to me this feels like a more rounded plant portrait, it gives the orchid a surrounding to grow in so to speak. It also helps me to remember where I encountered this particular plant and where it prefers to grow, and what other indicator species I might need to be aware of if I want to find it again. And of course I think it’s just a beautiful addition and it’s fun to do! I keep those surrounding elements really loose, since I don’t want them to detract from what the sketch is about. That way I can also integrate different sketching techniques, and that usually makes me really happy.
As always, feel free to leave your questions or comments in the comments!
I enjoyed watching this video. It is very informative and entertaining. Your work is absolutely beautiful! I especially like the look of watercolor and ink, and the way you use those two together to render your nature subjects is amazing! What I really like about your technique is that the look is structured enough to the show details (I am a very detail-oriented person and prefer realism over totally loose watercolor) yet at the same time it looks loose and free – the best of both styles! I really like how you’ve incorporated the loose background into your plants – that really adds a refreshing feel to the overall picture. Last summer I decided (late in life) that I needed to learn how to paint and draw, so in pursuit of that goal, I took one of your SkillShare classes on nature journaling and had fun with it. However, for some reason, I still get stuck in some way with creating my own nature journal. This video has inspired me to keep working at it! Thanks for sharing your knowledge and expertise!
Thank you! I really like this combination too, for the same reasons you mentioned: it’s detailed, yet loose. I really hope you’ll continue journaling. What helped me is to see the sketchbook as an expression of my curiosity about nature, and of the interesting things I saw, and not so much as an art project in itself. The art gets better by itself over time, with a few basic techniques.
Another lovely and informative video. Thank you very much!
Julia, in this video you said that you looked at the subject more than the page. Since you were back in the studio, were you looking at a photo of the plant as you were finishing it, or just remembering what it looked like? If you were working from a photo, it would be great to see that as well. Thank you so much for this and the previous video from out in the field. Really well done! I enjoyed both.
Yes, I had taken photos so that I could finish the sketch at home. I will try to include the reference in the next video like this.
Thank you for the video Julia, I liked it.
You’re welcome Juan!
Thank you, Julia. This is very interesting and inspiring! One question: do you erase your pencil sketch lines after you have inked them in or will they simply disappear under the watercolor? Yesterday I sat under an ancient oak, looking up and sketching its magnificent branches and translucent leaf canopy. To judge from the pain in my neck I awakened to today, I really could better have made a loose sketch to finish at home. Live and learn! All my best wishes, Laura
Ha, you reminded me that I often forget to erase my pencil lines. The sketch will look a bit cleaner without additional pencil, although they will be covered by the paint. Except for very light areas. But I think for a sketch it’s ok to show the construction. Your sketching session under that tree sounds wonderful despite the neck pain – I hope that will pass soon!
Cómo principiante aprecio tu trabajo y lo admiro. Me gustó verte en la naturaleza obtener tus bocetos, me pareció asombroso y cuando esté menos frío en mi país, Uruguay, saldré con mis ilusiones de lograr capturar la bella naturaleza de los parques que tenemos.
Muy bueno conocerte y seguirte! Te tendré al tanto de mis progresos. Cariños.
Thank you so much Emy, I would love to see some sketches from your home, it must be so beautiful. And I hope you’ll enjoy sketching outside a lot!
Thank you Julia, I am just beginning to learn to draw and paint and find your work and videos interesting and helpful. I am thoroughly enjoying following your blog.